Table of Contents
Treating bees for mites, particularly Varroa mites, is crucial for hive health. It’s best done late summer or early fall, after honey harvest, to reduce mite populations before winter. Nevertheless, monitoring mite levels throughout the year is essential, as treatment might be necessary at other times if infestation levels are high. Always use approved treatments and follow label instructions to ensure bee safety.
In the below paragraphs, we will take a more detailed look at this topic.
There are various things that can affect the health and survival rate of your bees. The list can include moisture, extreme fluctuations in temperature, invasion by rodents, and an infestation of mites. Indeed, a mite infestation is especially serious and can wipe out an entire colony of bees if left untreated. Fortunately, mites can be treated and eradicated before too much damage has been done. So the question you are now probably asking yourself right now is, ‘how do I know if my hives are affected, and if they are when should I treat my bees for mites?’ In this article, I will discuss how you can spot mites and what to do if your hive does have them.
Does Your Beehive have Mites?
There are two types of mites that can affect beehives in the U.S. – tracheal mites and Varroa mites. Both can devastate entire bee colonies, so their presence in a hive is a very serious matter.
Tracheal mites get into the breathing tubes of young bees and can cause difficulty breathing. The mated female mites will then pass from one bee to another. This actually means that an infestation of tracheal mites is usually much worse in the winter when bees are clustered together to keep warm. You might be glad to find out that most bees in the U.S. are resistant to tracheal mites and it is rare for these to decimate a full colony.
Spotting tracheal mites can be tricky for a couple of reasons. First of all, they cannot be seen by the naked eye, and secondly the symptoms of an infestation are similar to other problems. The only tangible way to determine the presence of tracheal mites is to slice the thorax of a dead bee and examine the tissue under a microscope.
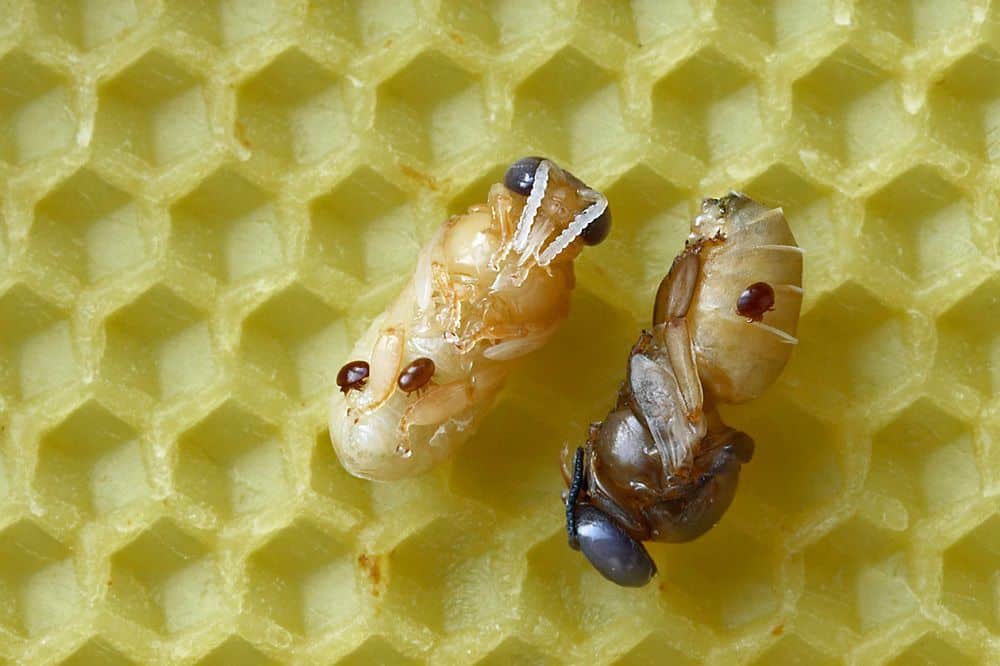
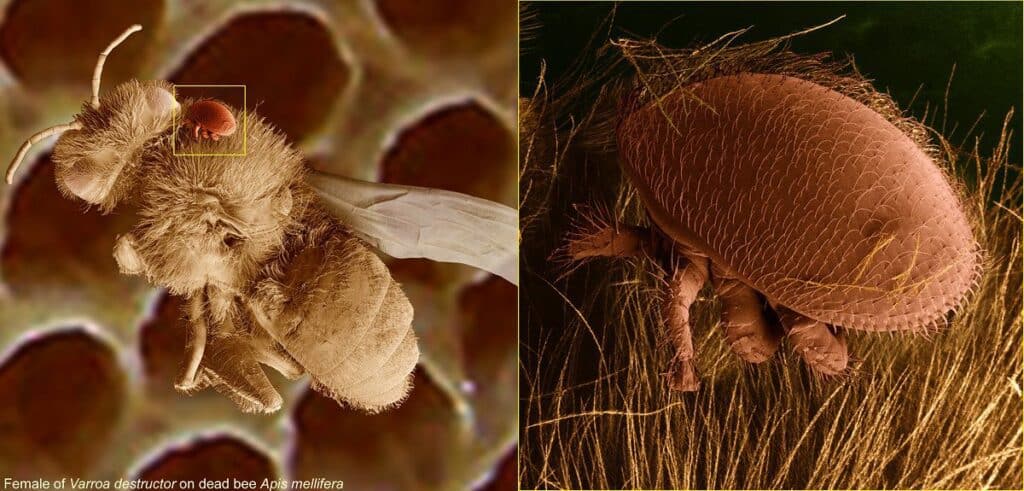
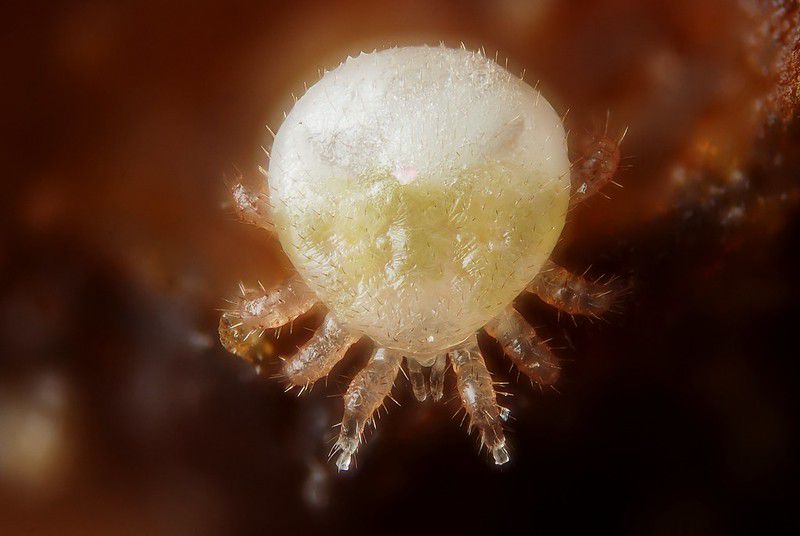
Varroa mites are a much more serious problem than tracheal mites. Thankfully, they are much easier to detect as unlike tracheal mites they are visible to the naked eye. Varroa mites look like small ticks and are about the same size as a pinhead. In the same way that ticks attach themselves to animals, female Varroa mites attach themselves to bees and then feed on their blood. They enter the cells in the hive and feed on the brood, laying their own eggs in the process.
You can usually tell the signs of varroa mites in your hive as there are a few indications:
- Varroa mites look like white or red spots when seen on white larvae
- If your hive has a Varroa mite problem, you are likely to see deformed bees
- Deformation of the wings of newly emerging bees usually indicates that Varroa mites have been at work.

Checking for a Mite Infestation Using the Sugar Roll Test Method
If you want to know for certain if your hive has been infected with mites, you can use what is known as the sugar roll test method:
The first thing you need to do is gather everything required to complete the test:
- Powdered sugar
- Tablespoon measuring spoon
- Sampling jar with a mesh/screened lid
- Half-cup measuring receptacle
- Large container with white bottom
- Water
- Paper towels.
Once you have all your materials gathered, you will need to choose a frame to test. When it comes to varroa mites, you can expect them to be concentrated on the nurse bees that are caring for the brood, so ideally you should test these bees. However, when selecting such a frame, make sure that the queen is not on it.

Getting the Bees
To get the bees for sampling, you will need to shake them from the frame into your container. The best way to do this is to place the tub on the ground and then firmly shake the frame in a downward motion directly over the container. Once the bees have been dislodged from the frame and are in the tub, place the frame back into the hive.
- Carter, Anthony (Author)
- English (Publication Language)
- 194 Pages - 02/28/2024 (Publication Date) - Independently published (Publisher)
To scoop the bees into your jar, you will need to shake them all into one corner of the container and then use your measuring cup to lift them out and into the jar. Once you have the bees in the jar, close the lid tightly. The bees left in the container should be returned to the hive. Remember, nurse bees don’t really fly and tend to cling to the frames. Place them back in the hive to keep them safe.
Adding the Sugar
Use your measuring spoon to add the powdered sugar into the jars, on top of the bees; two tablespoons of powdered sugar should be enough. The goal is to make sure that all the bees have been well coated in sugar so add a little bit more sugar if you think you need it.
Conducting the Test
The jar should now be rolled in your hand, hence the name of the test. Do not shake the jar, but rather roll it around in your hand at an angle. Aim to roll the jar for approximately two minutes. Once done, place the jar on the ground in the shade and leave it for another two minutes. This is a crucial step because during the two minutes of resting the bees will begin to heat up, which will then cause the mites to drop off.
Checking for Mites
While you have left the bees to rest in the jar for two minutes, you can place paper towels in the bottom of your container. The paper towels will make it easier for you to see mites.
After the rest period, shake the tub vigorously over the container. If there are any mites present, they will fall through the mesh/screen lid of the jar onto the paper towels. You do need to shake the jar quite hard to ensure that the mites will fall through the lid.
You can then open the lid of the jar and place the bees back into the hive, where they will be cleaned by the other bees.
Once you have returned the bees to the hive, you should spray the container with some water to dissolve the powdered sugar. This should leave any mites clearly visible in the tub. You may need to use a magnifying glass to count if the mites are small.
The Results
A half-cup measure typically contains about three hundred bees, but you will need to determine the number of mites per one hundred bees. This means that whatever number of mites you count, you will need to divide by three. This number will be the percentage of mites that you have. You then need to compare this to the threshold number in your area. If your percentage is higher than the threshold, you need to take action.
Available Treatments
When all is said and done, there are treatments available that will help to get rid of mites from your hive. Two of the more popular treatments are Apiguard and Apistan, although some mites have developed a resistance to Apistan.
Once you have treated the hive, it is important to stay on top of things to prevent another infestation from occurring. Monitoring your hive regularly is important. Once you have already dealt with a mite infestation, you will know what to look for going forward.
Talk to other beekeepers in your area about the problem because if you all use the same treatment program, the likelihood of another infestation will be greatly decreased.
When Should I Treat my Bees for Mites – Conclusion
In conclusion, mites are a serious threat to honeybees and can cause significant damage to their colonies if left unchecked. It is essential that you monitor your hives regularly and take preventative measures to keep mites under control. Regular inspections and treatments can help keep your colonies healthy and productive; early detection of mite infestations is critical to ensuring the survival of your bees. By staying vigilant and taking proactive steps to prevent and manage mites you can help protect your honeybees and ensure their continued health and wellbeing for years to come. Remember that beekeeping is an ongoing learning process, and staying informed and educated about mite management techniques and best practices is essential for successful beekeeping.
Looking to up your beekeeping game? Check out our latest product recommendations so you can take things to the next level!
Introducing The Top 12 Best Beekeeping Veils For 2024
Introducing The Top 20 Best Beekeeping Gloves For 2024
Introducing The Absolute Best Beekeeping Suits For 2024
The 15 Top Beekeeping Books for 2024
The Top 11 Honey Extractors for 2024
The Top 12 Mason Bee Houses for 2024
Beekeeping Disclaimer:
Beekeeping, like any agricultural activity, involves inherent risks. It is important to understand these risks and take appropriate measures to mitigate them.
Potential risks associated with beekeeping include:
- Bee stings: Honey bees are generally not aggressive but can become defensive if they feel threatened or their hive is disturbed. Bee stings can cause allergic reactions or even anaphylaxis in some individuals, which can be life-threatening. It is important to wear protective clothing and follow best practices when handling bees to minimize the risk of stings.
- Diseases and pests: Bees can be vulnerable to various diseases and pests, including mites, viruses, and bacterial infections. These can have significant impacts on bee colonies, leading to reduced honey production or even colony collapse. It is important to monitor hives regularly and take appropriate measures to prevent and treat diseases and pests.
- Weather conditions: Extreme weather conditions, such as drought or cold temperatures, can affect the health and productivity of bee colonies. It is important to ensure that hives are appropriately sheltered and provided with adequate food and water.
- Environmental hazards: Bees can be affected by environmental hazards such as pesticide exposure, pollution, and habitat loss. It is important to be aware of these hazards and take appropriate measures to protect bee colonies and promote healthy environments for bees.
- Legal requirements: Beekeeping may be subject to local, state, or national regulations, such as registration or inspection requirements. It is important to be aware of these requirements and comply with them.
While beekeeping can be a rewarding and enjoyable activity, it is important to be aware of the potential risks and take appropriate measures to mitigate them. By following best practices and staying informed about the latest developments in beekeeping, beekeepers can help ensure the health and productivity of their hives and contribute to the well-being of bee populations worldwide.
Last update on 2024-04-25 / Affiliate links / Images from Amazon Product Advertising API


